

Begin on the journey of setting up a powerful and flexible e-commerce platform like Magento on your Windows can be both exciting and daunting.
In this step-by-step guide, we will walk you through the process of installing Magento using Composer, XAMPP and Elasticsearch. Follow along to unleash the potential of Magento and kickstart your online store.
Table of Contents
Pre-requisites
Composer: Install Composer on your Windows required for Magento.
Elasticsearch: Install Elasticsearch on your Windows required for Magento.
Local Web Server XAMPP: Install XAMPP local server environment on your Windows which includes the Apache web server, MySQL database, and PHP version required for Magento.
Required below setting in php.ini file to run the Magento. Open the XAMPP Control Panel and follow below steps:
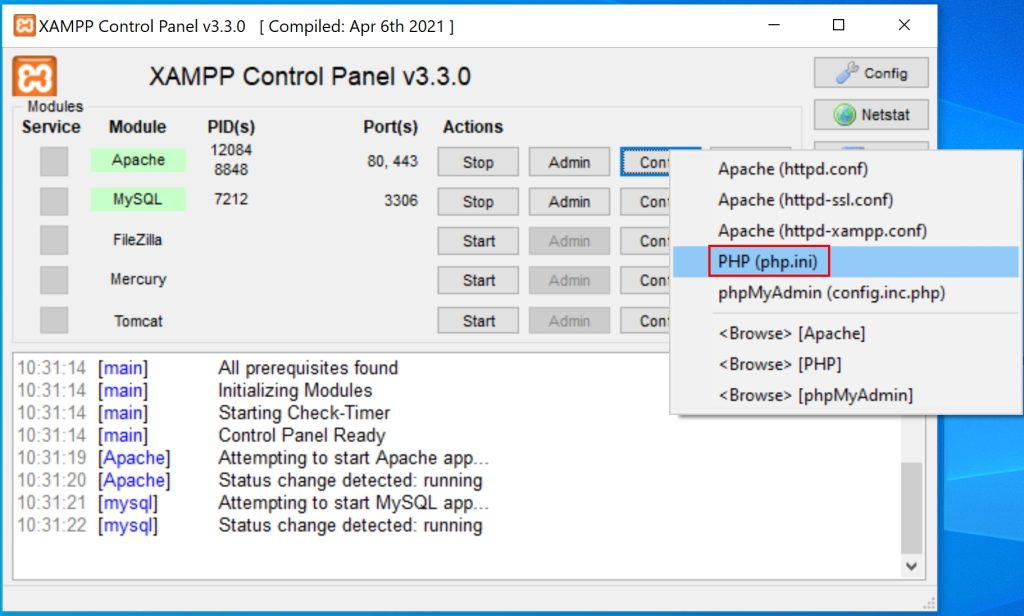
Remove comments i.e ‘;’ for below lines:
extension=gd
extension=gmp
extension=intl
extension=mbstring
extension=openssl
extension=soap
extension=sockets
extension=sodium
extension=xsl
extension=zip
Change below parameters as mentioned below,
max_execution_time=18000
max_input_time=1800
memory_limit=4G
Versions Requirements for Magento Setup
Below version will be installed for this guide,
- Composer Version 2.6.6.
- Elasticsearch Version: 7.17.17.
- Make sure Elasticsearch is running, open a web browser and navigate to http://localhost:9200
- PHP Version 8.2.4.
- Start the XAMPP service for Apache and MySQL.
Create A Directory For Your Magento Installation
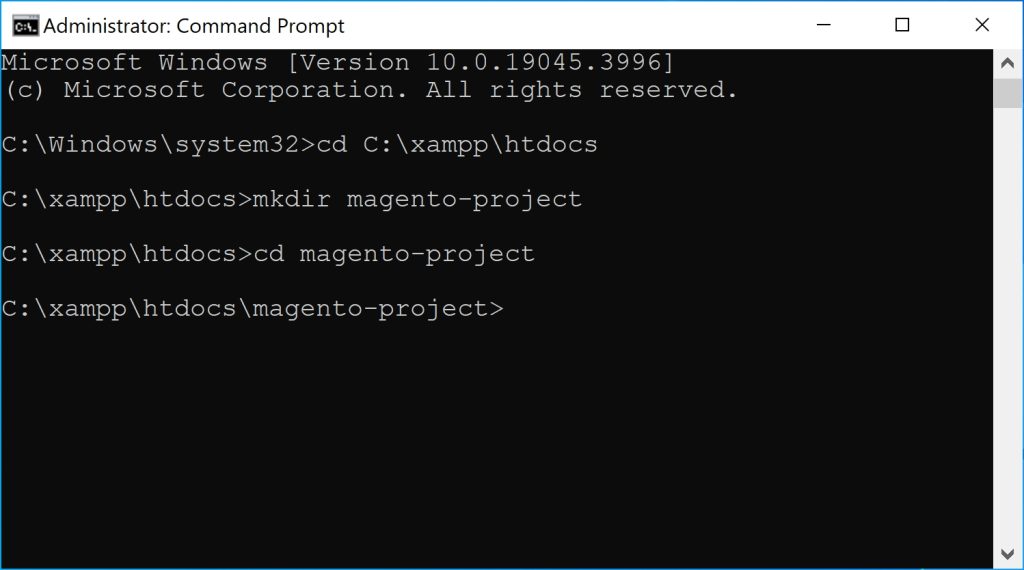
Open your terminal and navigate to the directory in XAMPP folder where you want to install Magento and run below command:
cd C:\xampp\htdocs
Create a new directory for your project using the following command:
mkdir magento-project

cd magento-project
Create Account on Commerce Marketplace
Sign In to the Commerce Marketplace. If you don’t have an account, click Register.
Follow the below steps as mentioned to get the keys to install the Magento.
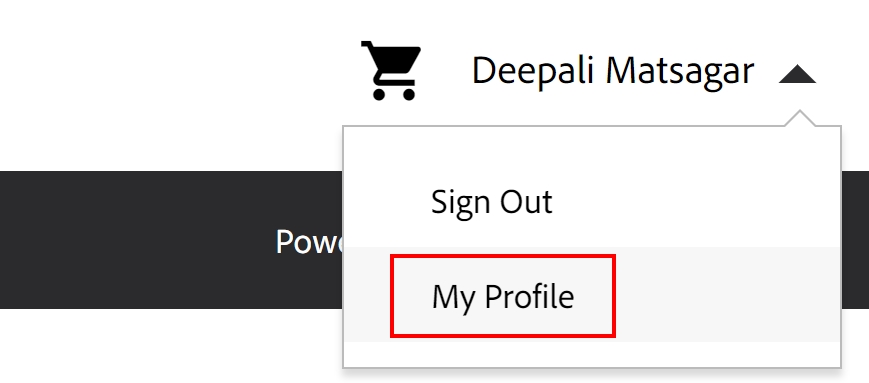
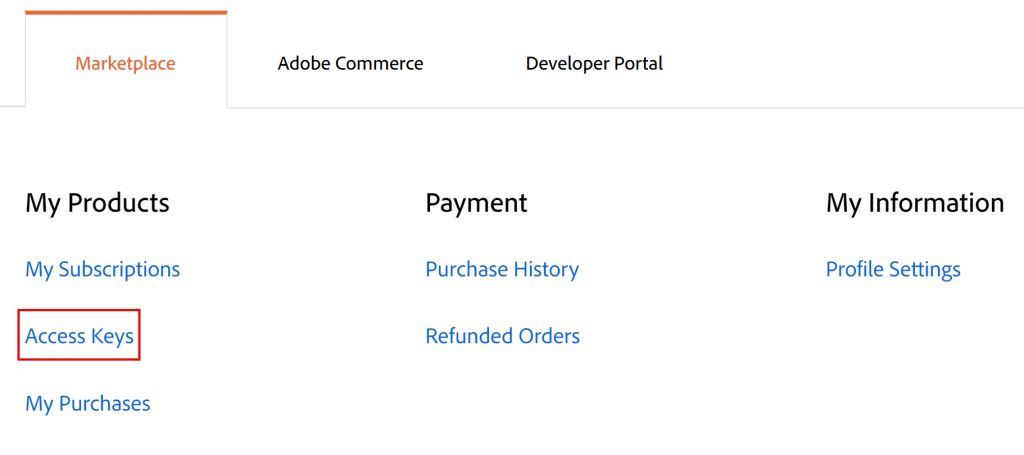
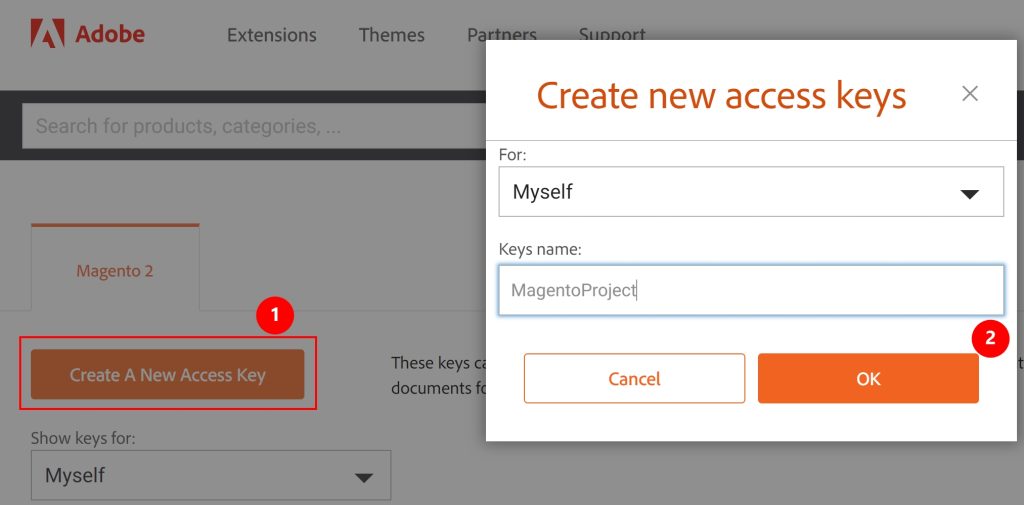
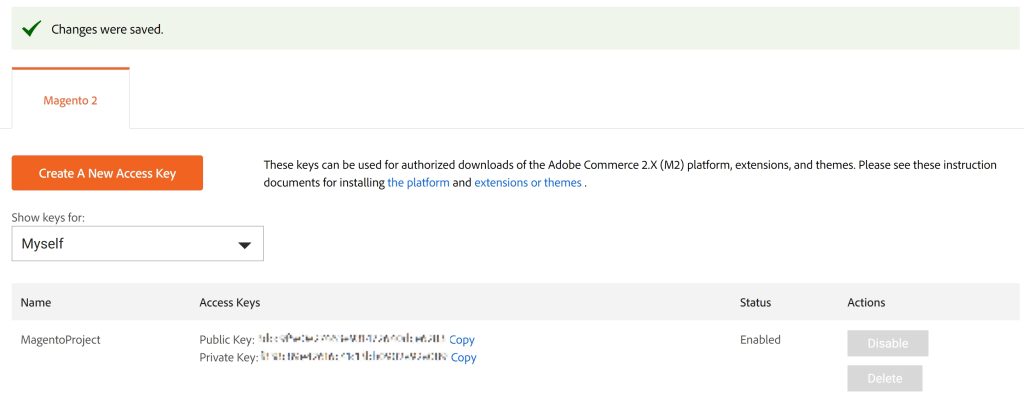
Install Magento Using Composer
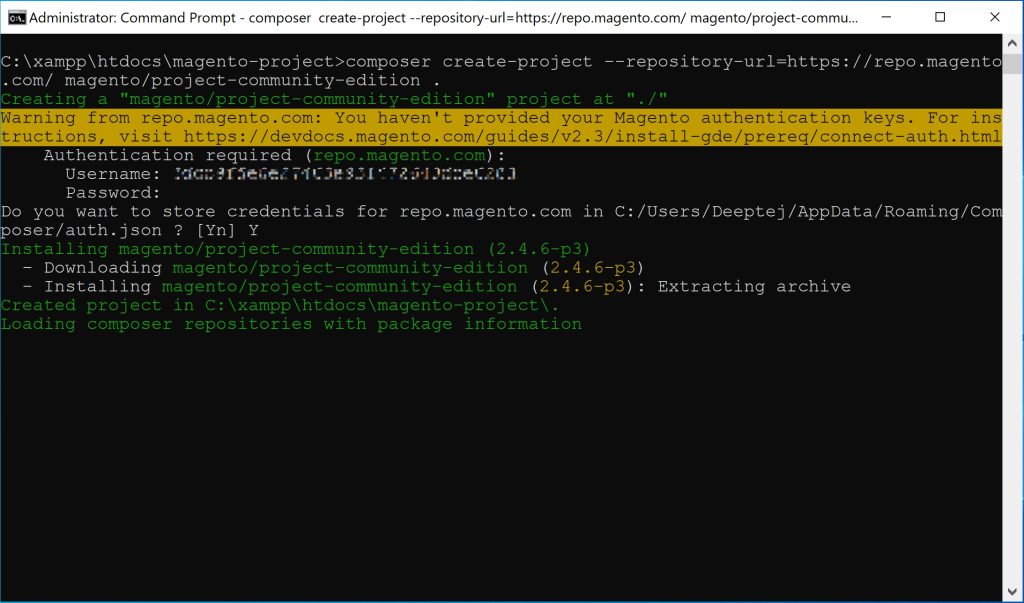
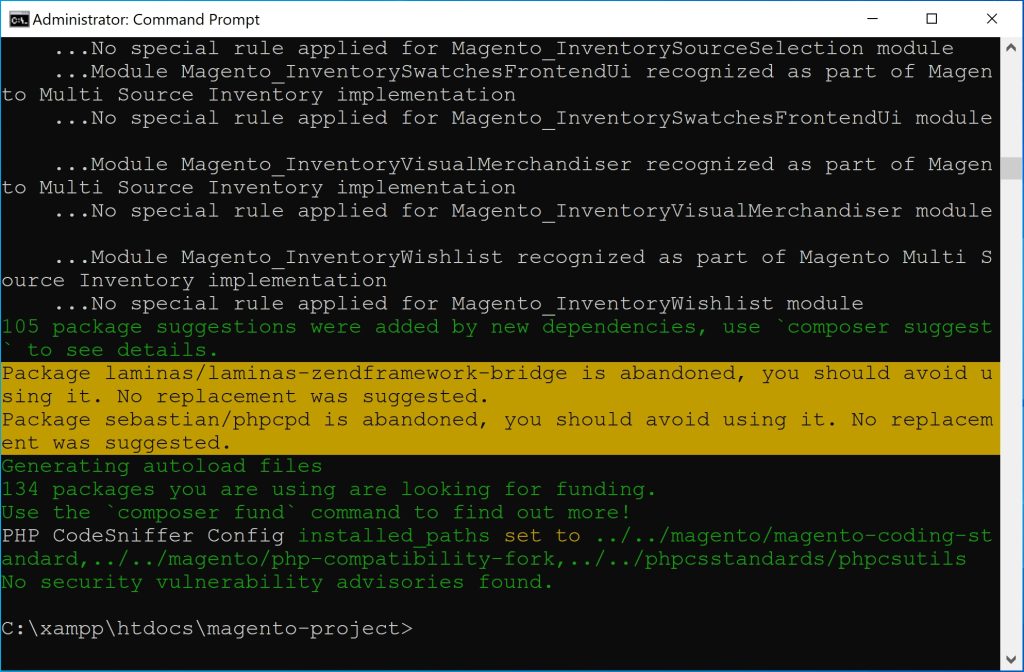
Run the following Composer command to install Magento:
composer create-project --repository-url=https://repo.magento.com/ magento/project-community-edition .
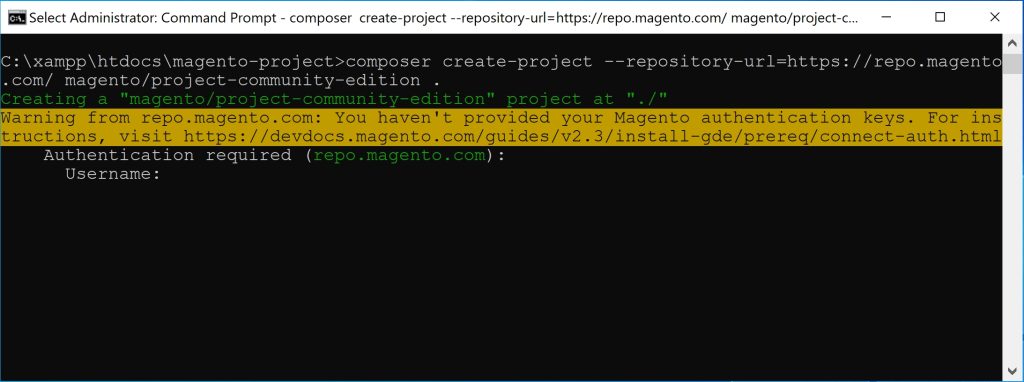
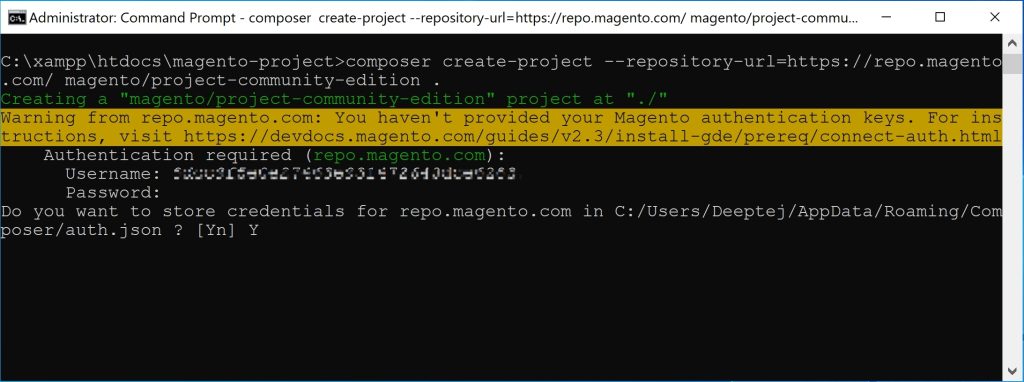
Generated keys on the commerce marketplace use Public Key as your username and the Private Key as your password. Put Y and enter to continue.
Or you can also set Public Key and Private Key using below commands:
composer config --global http-basic.repo.magento.com <public-key> <private-key>
Create a Database
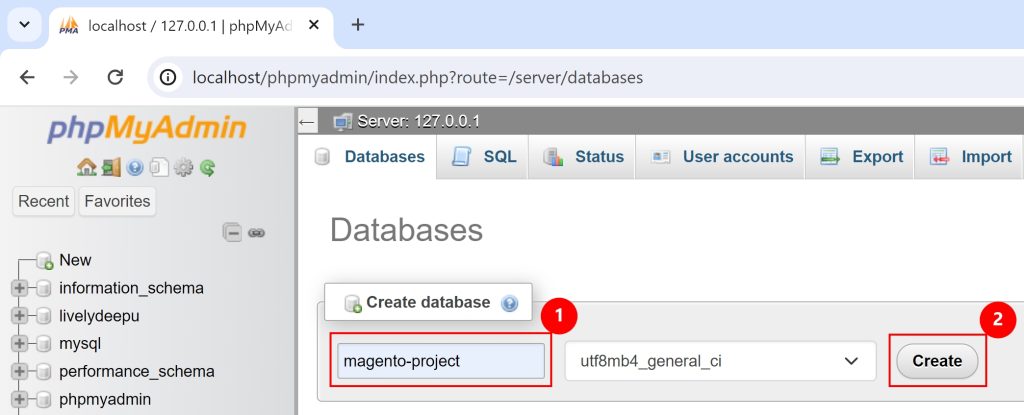
In XAMPP Control Panel, create a database for the Magento project as below:
Run Magento Setup
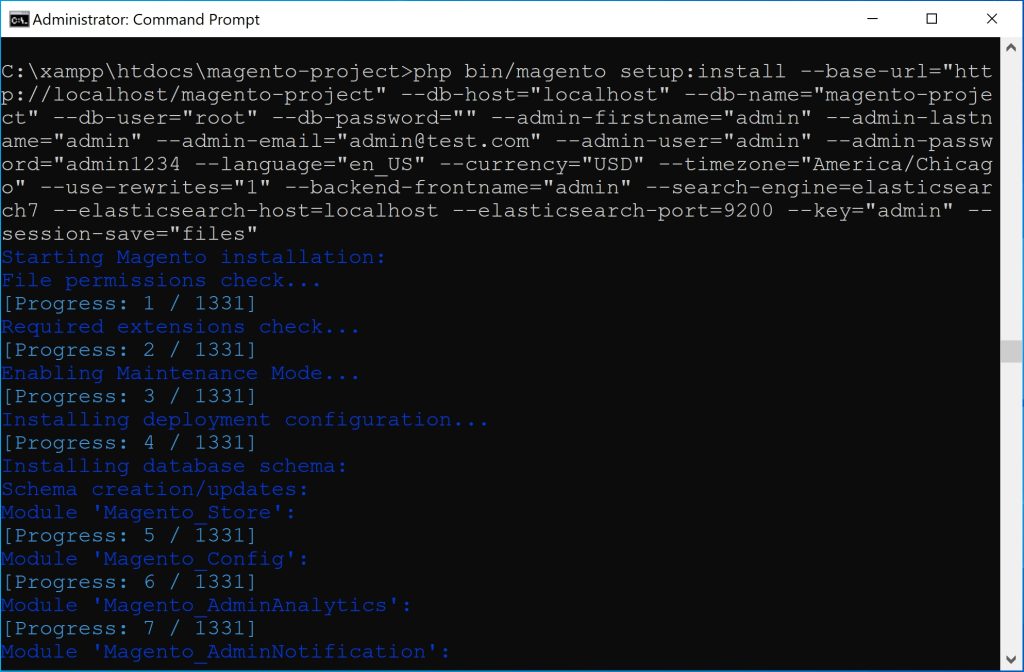
Navigate to your Magento installation directory C:\xampp\htdocs\magento-project and run the Magento setup command:
php bin/magento setup:install --base-url="http://localhost/magento-project" --db-host="localhost" --db-name="magento-project" --db-user="root" --db-password="" --admin-firstname="admin" --admin-lastname="admin" --admin-email="admin@test.com" --admin-user="admin" --admin-password="admin1234 --language="en_US" --currency="USD" --timezone="America/Chicago" --use-rewrites="1" --backend-frontname="admin" --key="admin" --session-save="files"
Installing Magento 2.4 Error
When installing Magento 2.4 you will get error in below files.
In PatchApplier.php line 172:
In Gd2.php line 70:
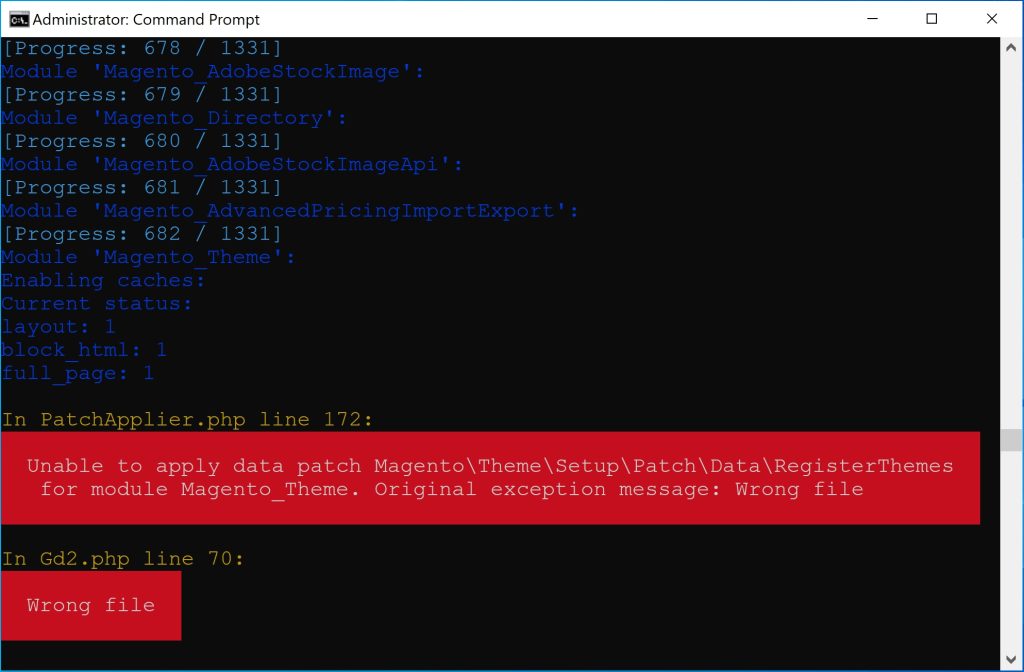
Open the file \magento-project\vendor\magento\framework\Image\Adapter\Gd2.php
Find function validateURLScheme and and replace with below code,
private function validateURLScheme(string $filename) : bool
    {
        $allowed_schemes = ['ftp', 'ftps', 'http', 'https'];
        $url = parse_url($filename);
        if ($url && isset($url['scheme']) && !in_array($url['scheme'], $allowed_schemes) && !file_exists($filename)) {
            return false;
        }
        return true;
    }
After completing required changes mentioned above, again run the setup command and now the Magento Setup is installed successfully.
php bin/magento setup:install --base-url="http://localhost/magento-project" --db-host="localhost" --db-name="magento-project" --db-user="root" --db-password="" --admin-firstname="admin" --admin-lastname="admin" --admin-email="admin@test.com" --admin-user="admin" --admin-password="admin1234 --language="en_US" --currency="USD" --timezone="America/Chicago" --use-rewrites="1" --backend-frontname="admin" --key="admin" --session-save="files"
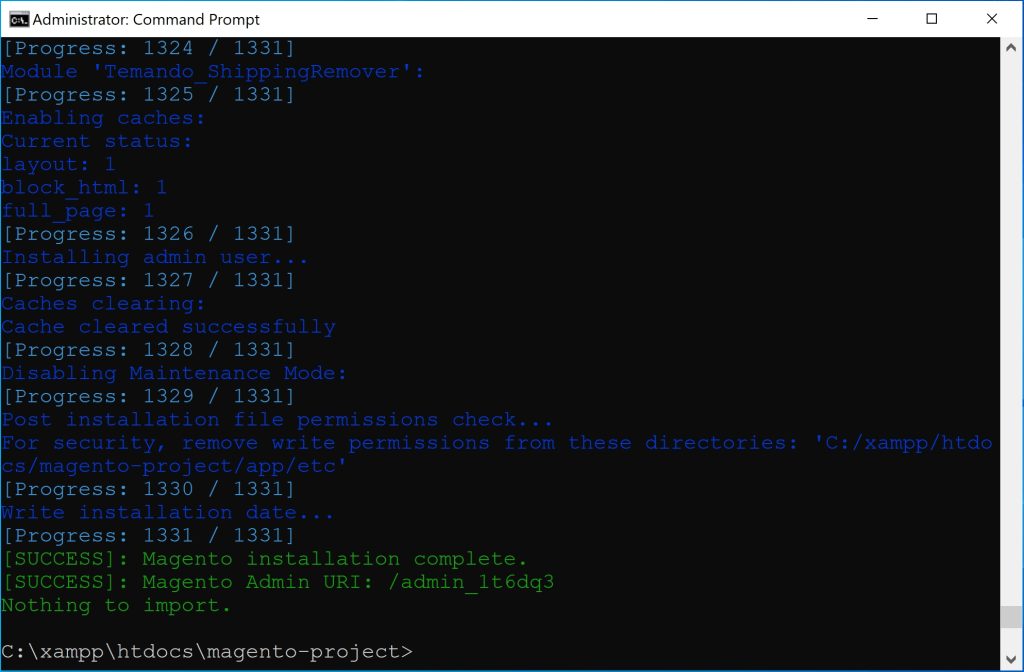
Create .htaccess file
Copy the index.php and .htaccess files from \magento-project\pub to your root folder and make the changes as mentioned below:
require DIR . '/app/bootstrap.php';
Complete the Installation
Static Content Load issue
To load the static data for the store content run below queries in database:
INSERT INTO `core_config_data` (`config_id`, `scope`, `scope_id`, `path`, `value`, `updated_at`) VALUES (NULL, 'default', '0', 'web/secure/base_static_url', 'http://localhost/magento-project/pub/static/', current_timestamp());

INSERT INTO `core_config_data` (`config_id`, `scope`, `scope_id`, `path`, `value`, `updated_at`) VALUES (NULL, 'default', '0', 'web/unsecure/base_static_url', 'http://localhost/magento-project/pub/static/', current_timestamp());

INSERT INTO `core_config_data` (`config_id`, `scope`, `scope_id`, `path`, `value`, `updated_at`) VALUES (NULL, 'default', '0', 'web/secure/base_media_url', 'http://localhost/magento-project/pub/media/', current_timestamp());

INSERT INTO `core_config_data` (`config_id`, `scope`, `scope_id`, `path`, `value`, `updated_at`) VALUES (NULL, 'default', '0', 'web/unsecure/base_media_url', 'http://localhost/magento-project/pub/media/', current_timestamp());
After the installation completes, to set the correct permissions and deploy static content run the following commands:
php bin/magento setup:upgrade # Run to update the database schema, data and upgrades

php bin/magento indexer:reindex # Run to update the transformed data as the data changes

php bin/magento setup:static-content:deploy -f # Run to deploy static content data

php bin/magento cache:flush

php bin/magento cache:clean
Access Your Magento Store
Now you can access your store homepage by navigate to the project URL
http://localhost/magento-project/
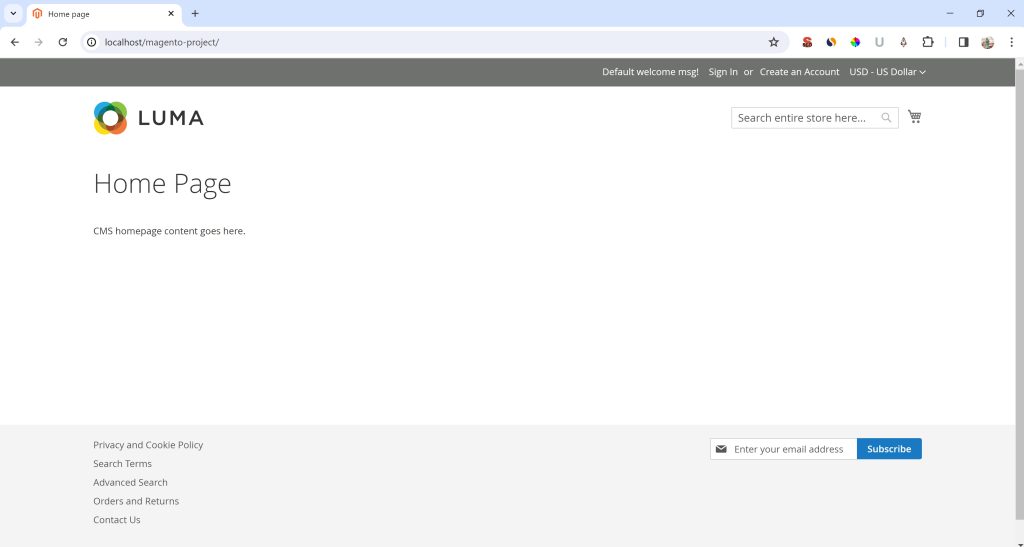
Magento Admin Page Blank Issue
When the login admin page showing blank, make the following changes,

Open the file \magento-project\vendor\magento\framework\View\Element\Template\File\Validator.php
Find the function isPathInDirectories and replace with below code,
protected function isPathInDirectories($path, $directories)
{
    $realPath = str_replace('\\', '/', $this->fileDriver->getRealPath($path));
    if (!is_array($directories)) {
        $directories = (array)$directories;
    }
    foreach ($directories as $directory) {
        if (0 === strpos($realPath, $directory)) {
            return true;
        }
    }
    return false;
}
Access your Magento store admin backend dashboard by navigate to the Magento URL http://localhost/magento-project/admin_1t6dq3
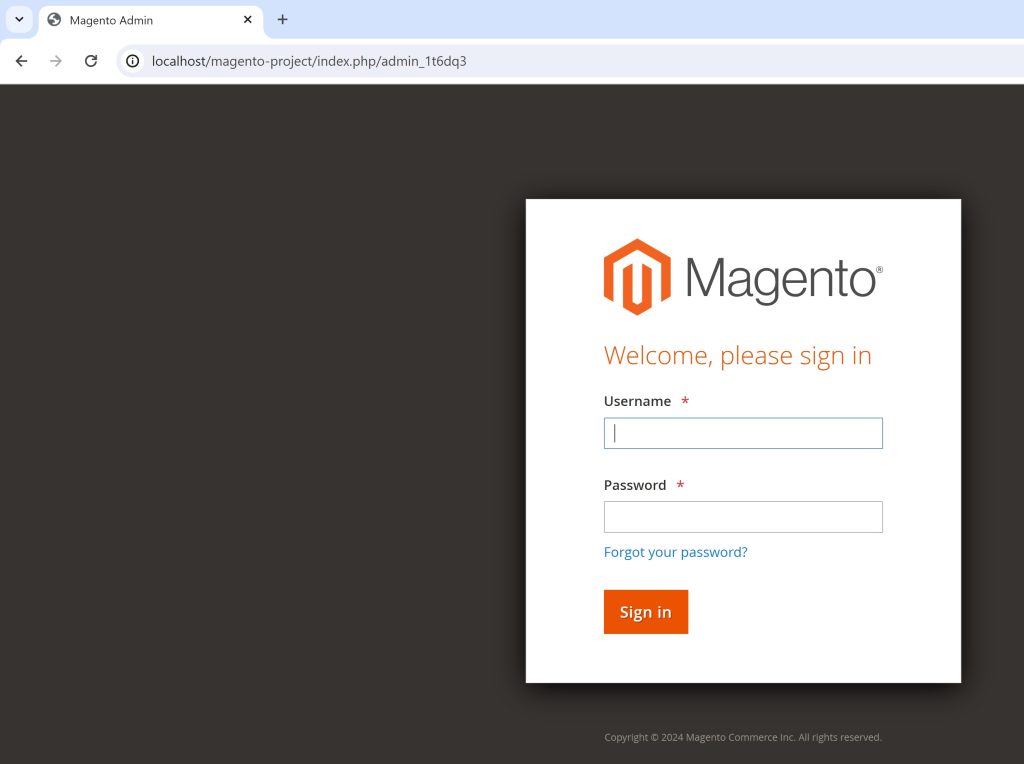
Account Disabled Temporarily Issue
Below issue is due to the admin user is lock and not able to access the backend.
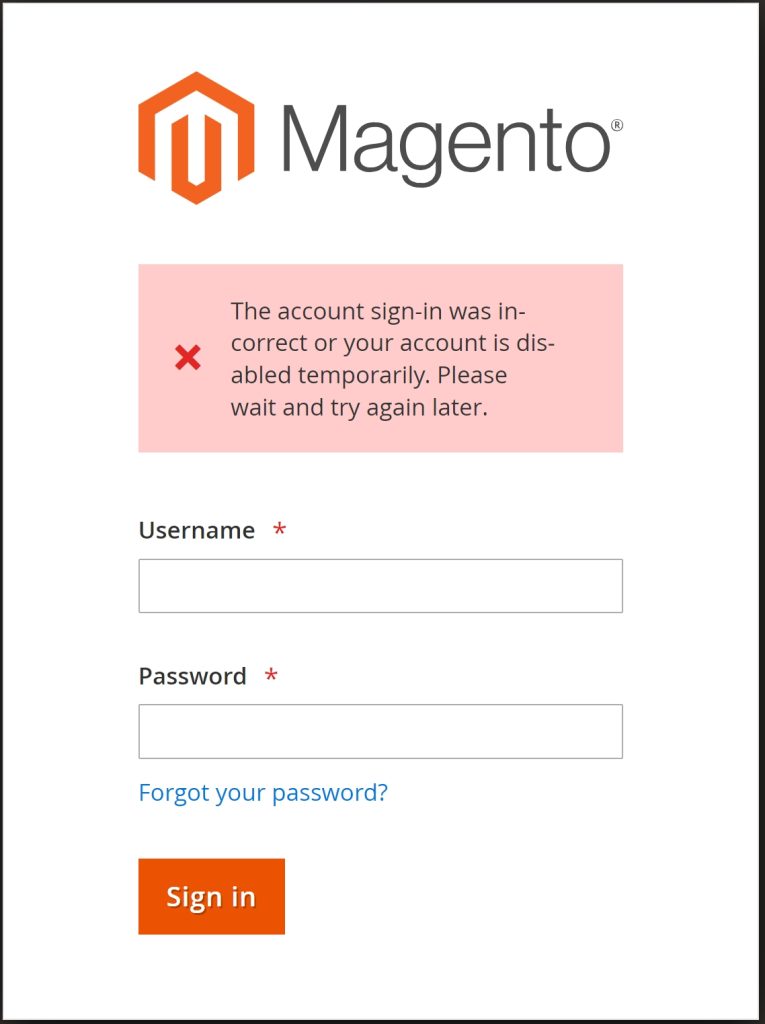
You can create admin user using below commands:
php bin/magento admin:user:create

You can unlock existing user using below command:
php bin/magento admin:user:unlock ADMIN

php bin/magento module:disable Magento_TwoFactorAuth Magento_AdminAdobeImsTwoFactorAuth
Login using the credentials you generated during installation. You can access your Magento store dashboard.
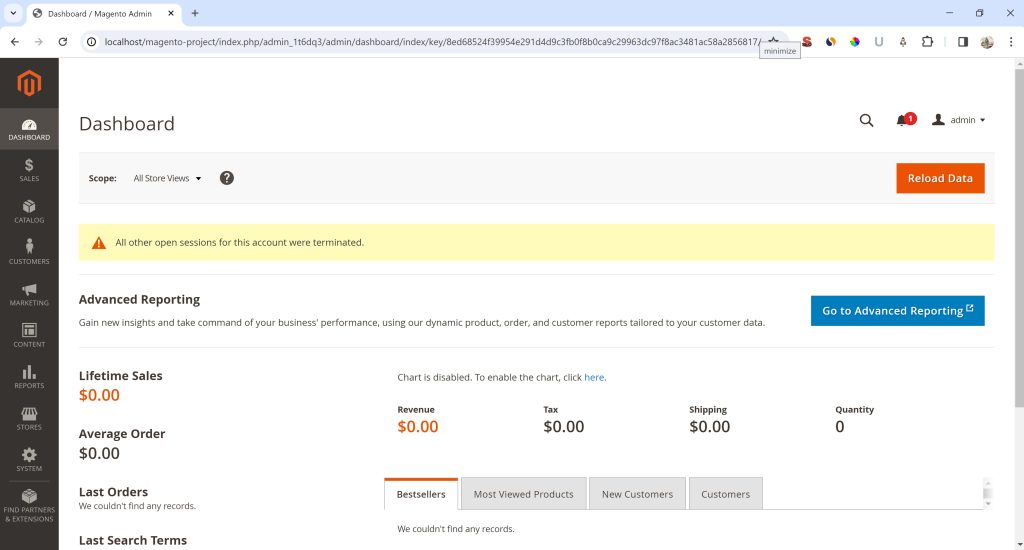
You have successfully installed Magento via Composer on your Windows machine. Your e-commerce journey can now begin, and you can start customizing your store to meet your business needs.
If you encounter any issues during the installation process, refer to the official Magento documentation for troubleshooting tips and additional information.

